dorado提供Border、HFlow、VFlow三种布局管理器实现页面布局。本节中采用不同颜色的div标签区分,并在其中放置Button按钮控件,演示不同的布局展现效果。
Border布局 |
|
Vertical Flow布局 |
|
Horizontal Flow布局 |
|
混合布局 |
|


在sample项目的src下新建ViewModel命名layoutControl。新建5个Button按钮控件,设置其中的id属性值依次为top、left、center、right、bottom。
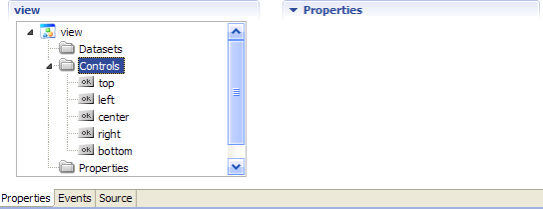
图16-01
新建layoutControl相关的JSP页面layout_control.jsp,在页面中添加布局标签代码。
Border布局
添加Border布局标签代码。步骤:【Dorado X-Insert窗口】—》【Tag Dorado Layout】—》【Layout(Border)】。
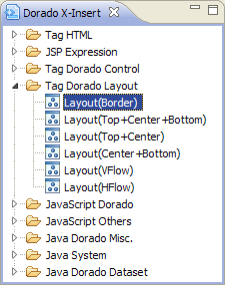
图16-02
双击【Layout(Border)】,添加Border布局标签代码。
<d:View config="layoutControl">
 <d:Layout type="border">
 <d:Pane position="top">
 </d:Pane>
 <d:Pane position="left">
 </d:Pane>
 <d:Pane position="center">
 </d:Pane>
 <d:Pane position="right">
 </d:Pane>
 <d:Pane position="bottom">
 </d:Pane>
 </d:Layout>
 <d:Button id="top" />
 <d:Button id="left" />
 <d:Button id="center" />
 <d:Button id="right" />
 <d:Button id="bottom" />
</d:View>
在JSP页面中调整布局管理器标签代码。
<d:View config="layoutControl">
 Border布局:
 <d:Layout type="border" border="1" borderColor="gray" width="300" height="200" padding="8px">
 <d:Pane position="top" style="background-color: #CCFFFF">
 <d:Button id="top" />
 </d:Pane>
 <d:Pane position="left" style="background-color: #FFDDFF">
 <d:Button id="left" />
 </d:Pane>
 <d:Pane position="center" style="background-color: #F0F0F0">
 <d:Button id="center" />
 </d:Pane>
 <d:Pane position="right" style="background-color: #FFFFB3">
 <d:Button id="right" />
 </d:Pane>
 <d:Pane position="bottom" style="background-color: #D7D7FF">
 <d:Button id="bottom" />
 </d:Pane>
 </d:Layout>
</d:View>

图16-03
保存全部修改,刷新页面查看border布局。
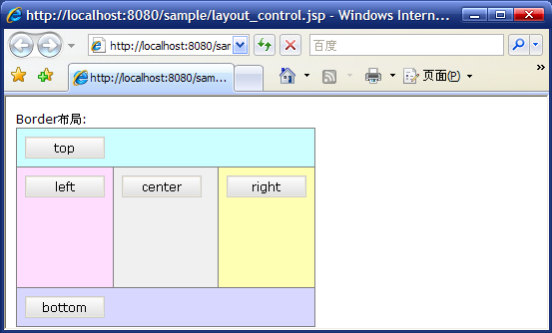
图16-04
HFlow布局
在LayoutControl中添加5个Button按钮,设置id分别为horizontal1、horizontal2、horizontal3、horizontal4、horizontal5。
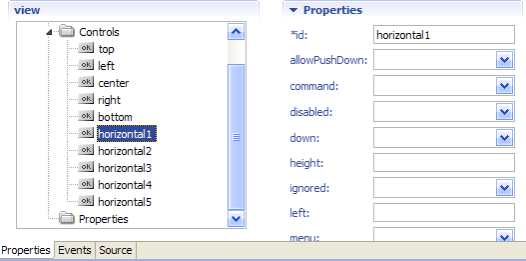
图16-05
添加HFlow布局标签代码。步骤:【Dorado X-Insert窗口】—>【Tag Dorado Layout】—>【Layout(HFlow)】。
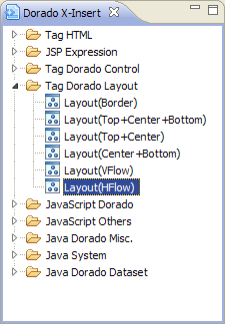
图16-06
双击【Layout(HFlow)】添加HFlow布局代码。
<d:Layout type="Hflow">
 <d:Pane>
 </d:Pane>
 <d:Pane>
 </d:Pane>
 <d:Pane>
 </d:Pane>
</d:Layout>
在JSP页面中调整HFlow布局管理器标签代码。
<br>
 horziontal布局:
 <d:Layout type="Hflow" border="1" borderColor="gray" height="60" padding="8px">
 <d:Pane style="background-color: #CCFFFF">
 <d:Button id="horizontal1" />
 </d:Pane>
 <d:Pane style="background-color: #FFDDFF">
 <d:Button id="horizontal2" />
 </d:Pane>
 <d:Pane style="background-color: #F0F0F0">
 <d:Button id="horizontal3" />
 </d:Pane>
 <d:Pane style="background-color: #FFFFB3">
 <d:Button id="horizontal4" />
 </d:Pane>
 <d:Pane style="background-color: #D7D7FF">
 <d:Button id="horizontal5" />
 </d:Pane>
 </d:Layout>
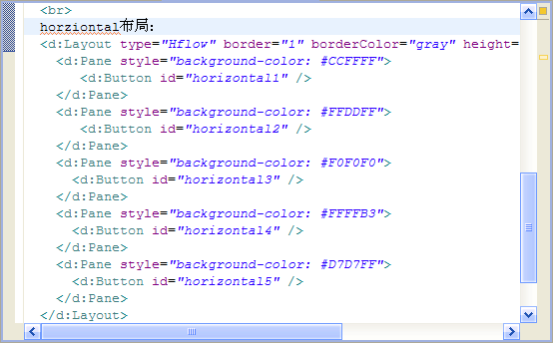
图16-07
保存全部修改,查看HFlow布局效果。

图16-08
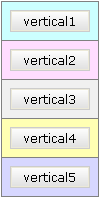
VFlow布局
在LayoutControl中添加5个Button按钮,设置id分别为vertical1、vertical2、vertical3、vertical4、vertical5。
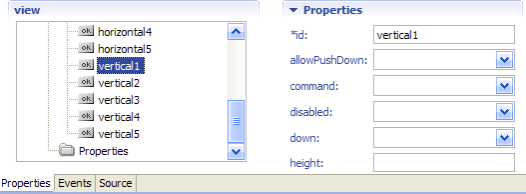
图16-09
添加hflow布局标签代码。步骤:【Dorado X-Insert窗口】—>【Tag Dorado Layout】—>【Layout(VFlow)】。
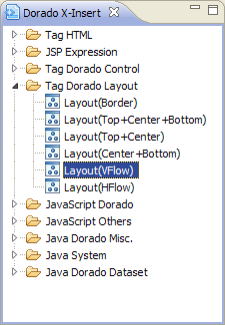
图16-10
双击【Layout(VFlow)】添加VFlow布局代码。
<d:Layout type="vflow">
 <d:Pane>
 </d:Pane>
 <d:Pane>
 </d:Pane>
 <d:Pane>
 </d:Pane>
</d:Layout>
在JSP页面中调整VFlow布局管理器标签代码。
<br>
 vertical布局:
 <d:Layout type="vflow" border="1" borderColor="gray" width="60" padding="8px">
 <d:Pane style="background-color: #CCFFFF">
 <d:Button id="vertical1" />
 </d:Pane>
 <d:Pane style="background-color: #FFDDFF">
 <d:Button id="vertical2" />
 </d:Pane>
 <d:Pane style="background-color: #F0F0F0">
 <d:Button id="vertical3" />
 </d:Pane>
 <d:Pane style="background-color: #FFFFB3">
 <d:Button id="vertical4" />
 </d:Pane>
 <d:Pane style="background-color: #D7D7FF">
 <d:Button id="vertical5" />
 </d:Pane>
 </d:Layout>

图16-11
全部保存之后,刷新页面查看VFlow布局。
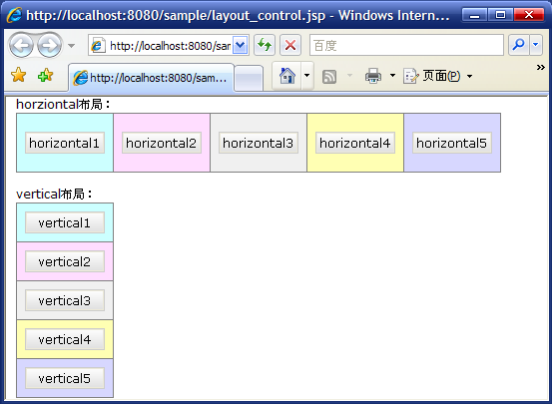
图16-12
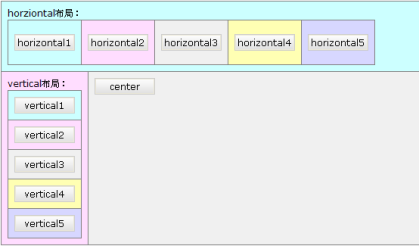
混合布局
混合布局是指将Border布局、HFlow布局、VFlow布局三种混合在一起构成一种包含三者的复杂布局展现。
调整layout.jsp页面中的布局代码,分三步实现混合布局。第一步,将HFlow布局代码剪切至Border布局代码中的top部分。即替换top按钮标签代码。
<d:Pane position="top" style="background-color: #CCFFFF">
 horziontal布局:
 <d:Layout type="Hflow" border="1" borderColor="gray" height="60" padding="8px">
 <d:Pane style="background-color: #CCFFFF">
 <d:Button id="horizontal1" />
 </d:Pane>
 <d:Pane style="background-color: #FFDDFF">
 <d:Button id="horizontal2" />
 </d:Pane>
 <d:Pane style="background-color: #F0F0F0">
 <d:Button id="horizontal3" />
 </d:Pane>
 <d:Pane style="background-color: #FFFFB3">
 <d:Button id="horizontal4" />
 </d:Pane>
 <d:Pane style="background-color: #D7D7FF">
 <d:Button id="horizontal5" />
 </d:Pane>
 </d:Layout>
</d:Pane>
第二步,将VFlow布局代码剪切至Border布局代码中的left部分。即替换left按钮标签代码。
<d:Pane position="left" style="background-color: #FFDDFF">
 vertical布局:
 <d:Layout type="vflow" border="1" borderColor="gray" width="60" padding="8px">
 <d:Pane style="background-color: #CCFFFF">
 <d:Button id="vertical1" />
 </d:Pane>
 <d:Pane style="background-color: #FFDDFF">
 <d:Button id="vertical2" />
 </d:Pane>
 <d:Pane style="background-color: #F0F0F0">
 <d:Button id="vertical3" />
 </d:Pane>
 <d:Pane style="background-color: #FFFFB3">
 <d:Button id="vertical4" />
 </d:Pane>
 <d:Pane style="background-color: #D7D7FF">
 <d:Button id="vertical5" />
 </d:Pane>
 </d:Layout>
</d:Pane>
第三步,删除Border布局中的right和bottom部分,调整页面布局代码。
<d:View config="layoutControl">
 Border布局:
 <d:Layout type="border" border="1" borderColor="gray" width="300" height="200" padding="8px">
 <d:Pane position="top" style="background-color: #CCFFFF">
 horziontal布局:
 <d:Layout type="Hflow" border="1" borderColor="gray" height="60" padding="8px">
 <d:Pane style="background-color: #CCFFFF">
 <d:Button id="horizontal1" />
 </d:Pane>
 <d:Pane style="background-color: #FFDDFF">
 <d:Button id="horizontal2" />
 </d:Pane>
 <d:Pane style="background-color: #F0F0F0">
 <d:Button id="horizontal3" />
 </d:Pane>
 <d:Pane style="background-color: #FFFFB3">
 <d:Button id="horizontal4" />
 </d:Pane>
 <d:Pane style="background-color: #D7D7FF">
 <d:Button id="horizontal5" />
 </d:Pane>
 </d:Layout>
 </d:Pane>
 <d:Pane position="left" style="background-color: #FFDDFF">
 vertical布局:
 <d:Layout type="vflow" border="1" borderColor="gray" width="60" padding="8px">
 <d:Pane style="background-color: #CCFFFF">
 <d:Button id="vertical1" />
 </d:Pane>
 <d:Pane style="background-color: #FFDDFF">
 <d:Button id="vertical2" />
 </d:Pane>
 <d:Pane style="background-color: #F0F0F0">
 <d:Button id="vertical3" />
 </d:Pane>
 <d:Pane style="background-color: #FFFFB3">
 <d:Button id="vertical4" />
 </d:Pane>
 <d:Pane style="background-color: #D7D7FF">
 <d:Button id="vertical5" />
 </d:Pane>
 </d:Layout>
 </d:Pane>
 <d:Pane position="center" style="background-color: #F0F0F0">
 <d:Button id="center" />
 </d:Pane>
 </d:Layout>
</d:View>
保存全部修改,刷新页面查看混合布局展现效果。
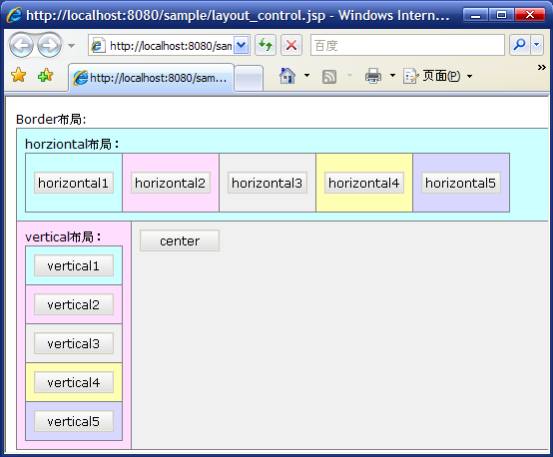
图16-13