添加页面导航条PagePilot
先做一个与TEST01完全相同的页面TEST02。添加一个页面导航条PagePilot。
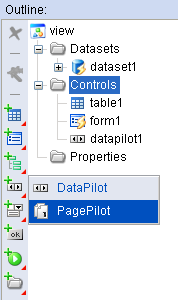
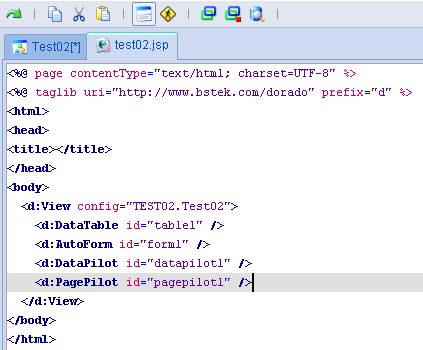
将PagePliot1的dataset属性设为dataset1,并把在视图模型中新添加的页面导航条PagePilot1,输出到JSP中。
|
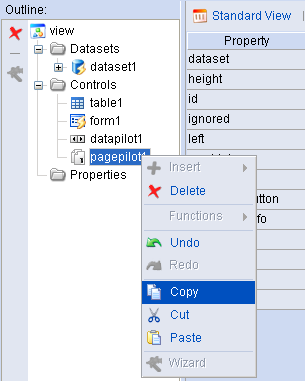
第一次由视图模型生成JSP是dorado Studio自动完成的,之后新增的控件就需要手动加到JSP中了。将视图模型中新添加的控件在输出到JSP中,可以手工写也可以在视图模型界面上Ctrl+C,在JSP界面上Ctrl+V输出,或者利用右键菜单与工具栏菜单。 |
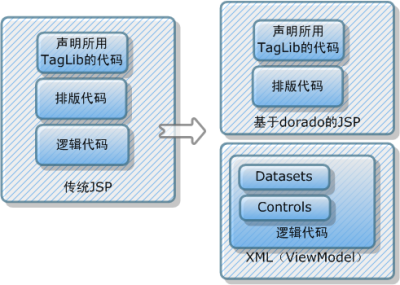
dorado原理:dorado开发中JSP的作用
|
|
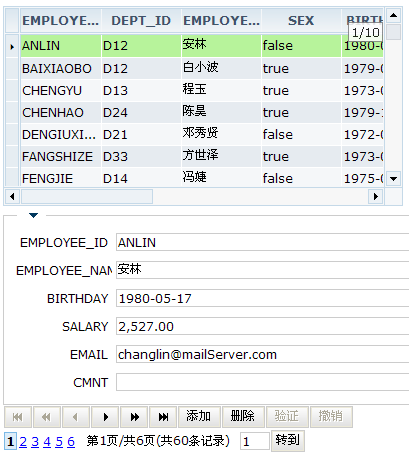
这时浏览test02.jsp,可以看到页面导航条已呈现在web页面中,但没有分页效果。

|
页面导航条PagePilot与数据导航条DataPilot不同,如果都没有绑定dataset,前者不出现,后者出现,但所有按钮灰化。 |
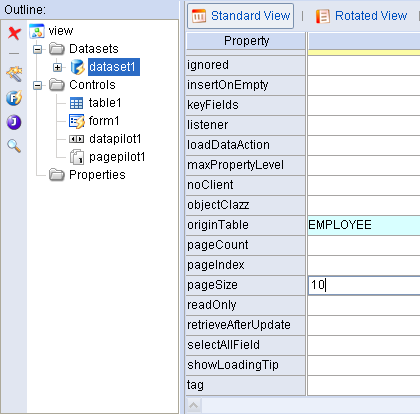
设置分页
将dataset1的pageSize属性设为10,保存全部后再浏览就出现了分页效果。
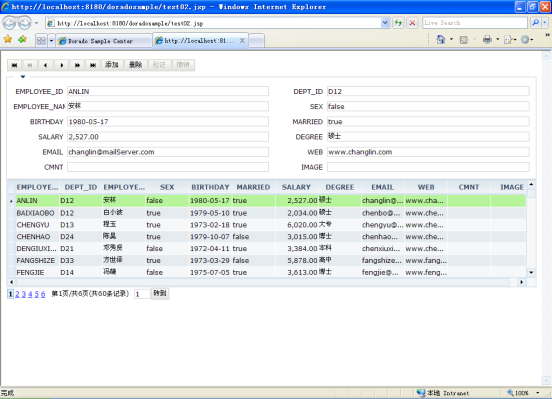
不仅页面导航条能看出分页效果,与dataset1绑定的table1右侧的数据定位滚动条也体现分页效果。
最后再把table1的width属性设为100%,调整JSP界面中的TagLib的输出位置,得到页面。
<%@ page contentType="text/html; charset=UTF-8" %> |
|
新增控件首次要添到JSP中,如果没输出,就看看是否绑定了dataset。分页在dataset中设置pageSize即可。 |